
Installing MySQL on Ubuntu 22.04 LTS is a straightforward process, perfect for setting up a reliable, high-performance database system. This guide will walk you through each step, from updating your system to securing and starting MySQL. By following these steps, you’ll have a fully functional MySQL installation ready for your development or production environment in no time.
Step 1: Update Your Package List
Before installing any new packages, it’s always a good idea to update the package list to ensure you have the latest information on available packages.
- sudo apt update


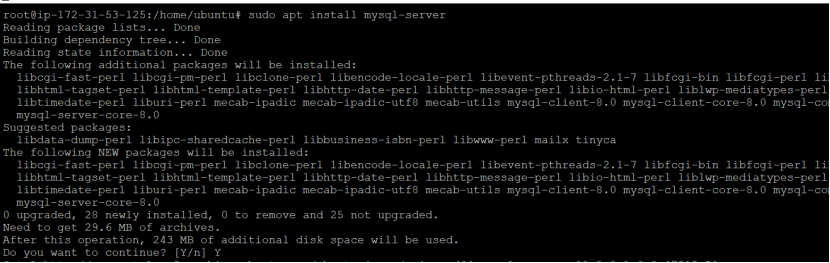
Step 2: Install MySQL Server
Install the MySQL server package using the following command:
- sudo apt install mysql-server
Step 3: Stop the MySQL Service
To make certain configurations, stop the MySQL service.
Stop the MySQL service:
- sudo service mysql stop
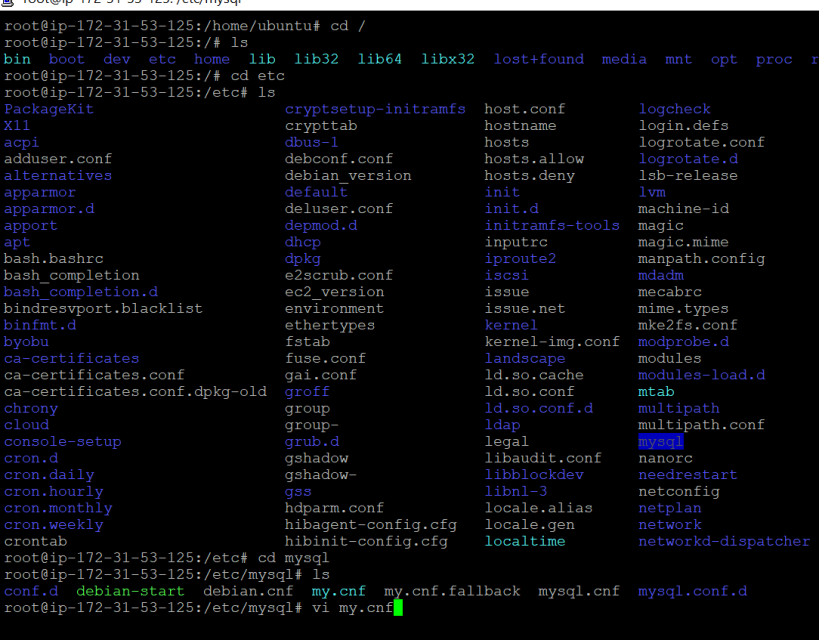
Step 4: Delete the MySQL Data Directory
Delete the MySQL data directory: (for set lower_case_table_names=1 parameters)
- sudo rm -rf /var/lib/mysql
Step 5: Recreate the MySQL Data Directory

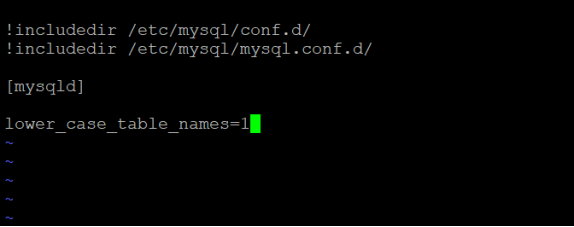
Add lower_case_table_names = 1 to the [mysqld] section in my.cnf File.
Re-initialize MySQL with –lower_case_table_names=1:
Step 6: Reinitialize MySQL with the New Parameter
Use the following command to reinitialize MySQL with the lower_case_table_names=1 parameter:
- mysqld –defaults-file=/etc/mysql/my.cnf –initialize –lower_case_table_names=1 –user=mysql –console
Step 7: Start and Check the MySQL Service
- sudo service mysql start
- sudo service mysql status

Step 8: Retrieve the New Generated Password for MySQL Root User
MySQL generates a new password for the root user during initialization. Retrieve this password to log in.

Step 09: Change the Password for MySQL Root User
- ALTER USER ‘root’@’localhost’ IDENTIFIED BY ‘Password’;
afterwards, OR by calling the “hardening” script anyway:
Step 10: Using MySQL Secure Installation Script
- sudo mysql_secure_installation

Check Mysql Version
- Mysql –version
Thank You !
Explore How to Create VM in AWS ?